Invoicing
Invoices are sent from the partner portal to retailers (e.g. ticket agents), summarising their sales and commission for a given period. Invoices follow the same filter-and-send workflow as reports, with a few key differences.
How invoices differ from reports
Creating an invoice
- Navigate to Insights > Custom in the sidebar.
- Click Create new report.
- Select Invoice report and click Continue.
Step 1: Set date filters
Invoices use the same date filter options as reports:
- Transactions — All transactions, Day range, or Date range
- Performances — All performances, Day range, or Date range
See Creating Reports — date parameters for details on each option.
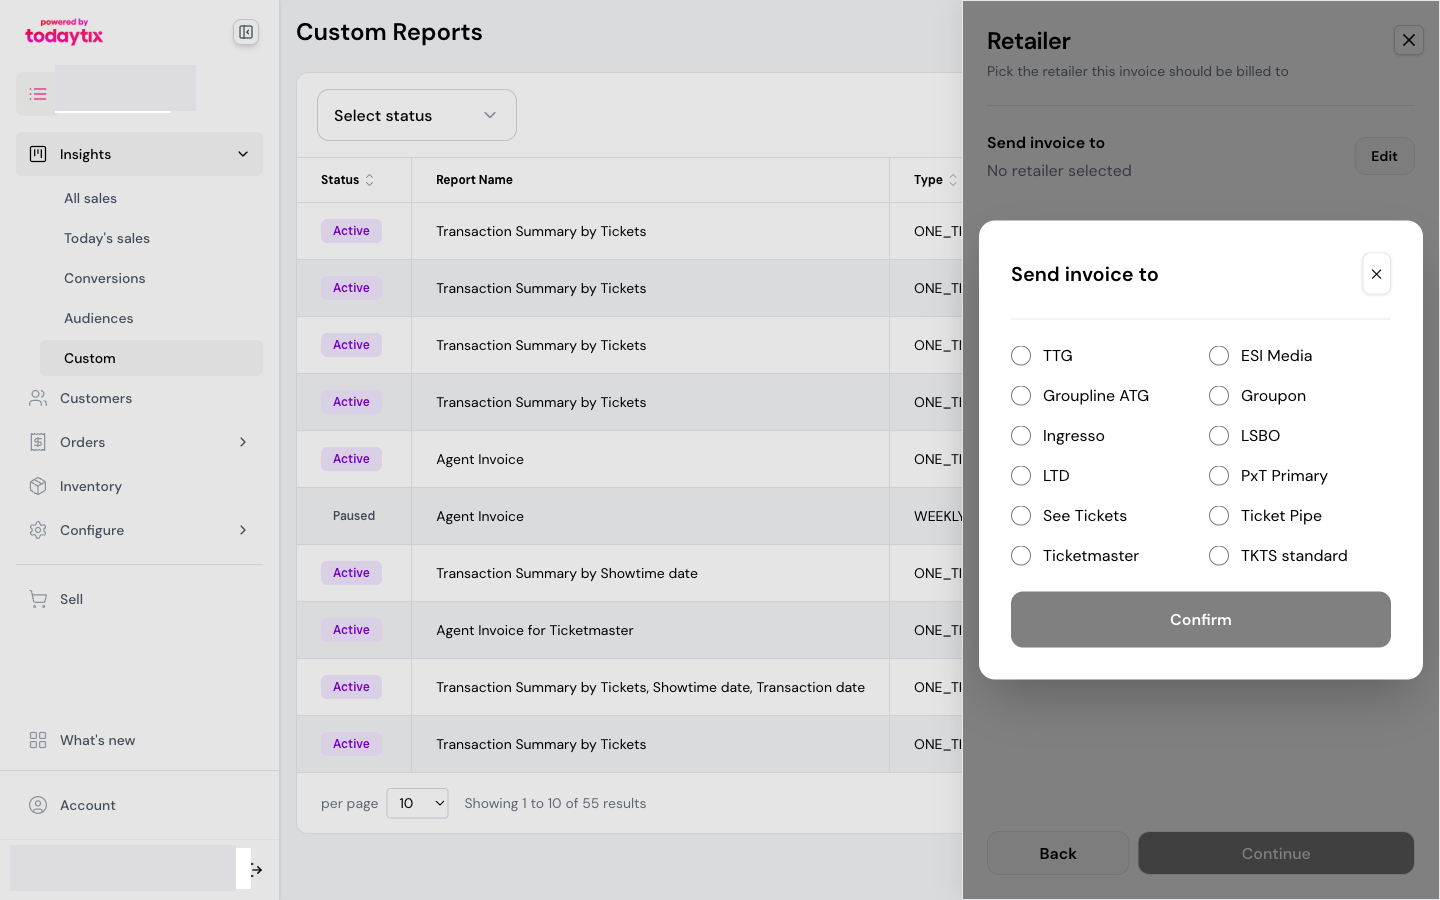
Step 2: Choose the retailer
Select the retailer this invoice should be billed to. Click Edit next to “Send invoice to” to pick from the list of retailers currently on sale with your show.
Click Edit to open the retailer list and select the retailer you want to invoice.
Each retailer’s contact details (name, address, email, VAT number) are pre-configured. If a retailer’s details change, contact your TTG partner manager to update them.
When a new retailer starts selling your show, confirm with your TTG partner manager that they have been added to the invoice recipient list. Retailers must be configured in the system before they can be invoiced.
Step 3: Choose format and schedule
Sending a draft first
Before sending an invoice to a retailer, always send a draft to yourself.
- After configuring the invoice, click Send Draft (not “Save changes”).
- The draft is sent to your email only — not the retailer.
- Drafts do not have an invoice number, so they cannot be confused with live invoices.
- Review the draft for accuracy — check the totals, commission rates, and date ranges.
- Once satisfied, return to the invoice and click Save changes to activate the live send.
Always send a draft before activating a new invoice, especially when invoicing a retailer for the first time. This gives you a chance to verify the data before the retailer sees it.
What the retailer receives
The invoice email includes:
- Invoice header — your show name, the retailer’s billing details, and the invoice number
- Line items — each ticket sold, with:
- Confirmation number and seat details
- Unit cost (face value)
- Commission rate and commission amount
- Net amount after commission
- VAT on commission
- Commission summary — total commission earned, net commission, VAT, and total owing
- Your bank details — for retailer payment (pre-configured in the system)
Retailers do not need a portal login to receive invoices — they are delivered entirely by email.
Common invoice configurations
Weekly retailer settlement
Send each retailer a weekly invoice summarising their previous week’s sales.
End-of-run reconciliation
Generate a one-time invoice covering the full run of a show for final settlement.
Next steps
- Creating Reports — build custom reports
- Report Column Reference — understand every column in the output
- Understanding Report Output — how to read the emailed report